
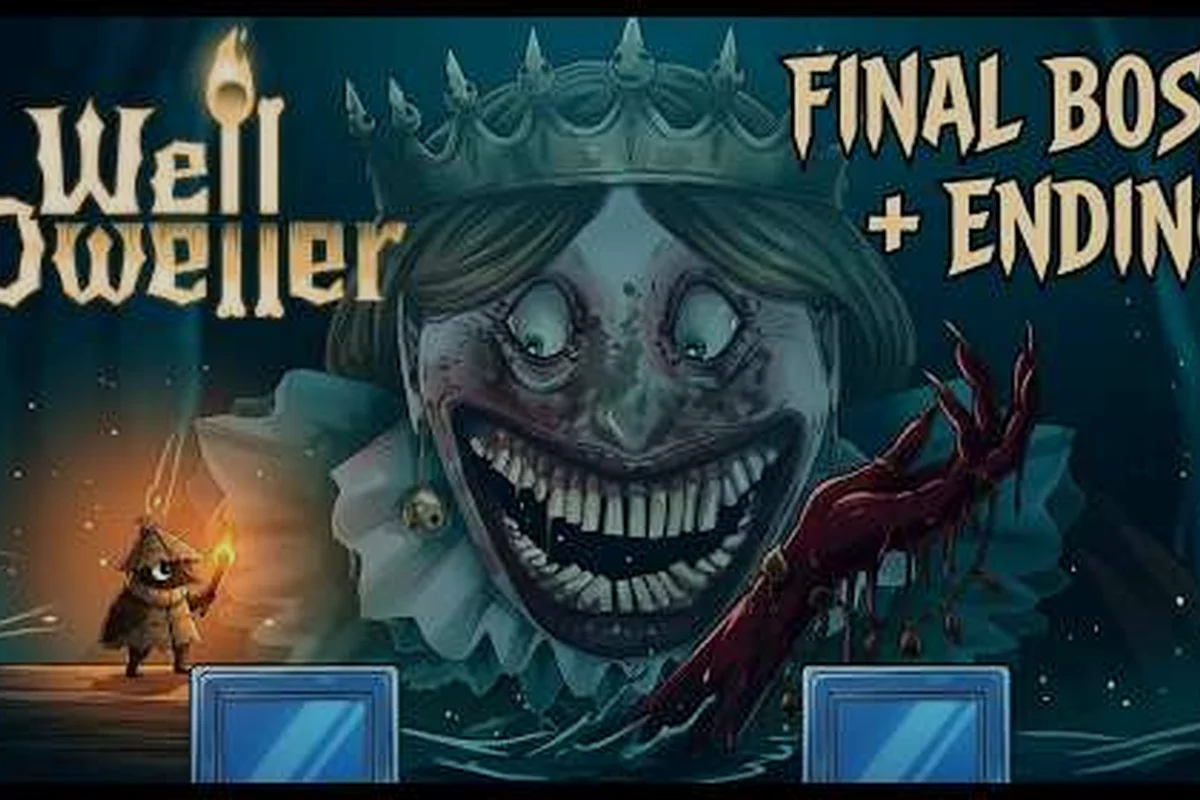
The Well Dweller hunter fight and the Queen finale sit on opposite ends of the kingdom, but they share the same punishing rhythm: a fast opener, a phase shift that resets the arena, and a small set of punish windows that decide the whole run. The hunter is the gauntlet you have to clear to unlock the upper castle, and the Queen is the test that uses everything you learned along the way. This guide breaks down both fights with specific damage windows, weapon matchups, and the trinket swaps that turn a 12-attempt slog into a clean two-cycle clear, so you can stop guessing and start finishing the story.
The Hunter: What This Boss Is Really Testing
The Hunter is not a tank — she is a tempo check. Her kit is built around punishing hesitation and rewarding players who learn to back off, bait the lunge, and punish the recovery frames. Most first attempts die in the first 30 seconds because players try to facetank the opening charge instead of reading the windup.
Phase Breakdown and HP Gates
The Hunter has two clear phases separated by a brief stagger animation. Phase 1 covers roughly 65-70% of her HP and is dominated by melee pressure. Phase 2 begins when she falls to one knee, lets out a short roar, and switches to a projectile-heavy kit that punishes tunnel vision.
| Phase | HP Threshold | Primary Attacks | Recommended Response |
|---|---|---|---|
| Phase 1 | 100% → ~32% | Chain slash, jump-over slash, ground stomp | Bait one attack, punish with 2-3 hits, reposition |
| Phase 1 stagger | ~32% HP | 1.5s vulnerable window | Free heavy attack + 1 vessel throw |
| Phase 2 | ~32% → 0 | Net toss, rolling chain, summoning crows | Maintain mid-range, punish after net recovery |
The stagger window between phases is the single biggest damage opportunity in the fight. A well-timed heavy strike plus a thrown vessel can chop 12-15% off her HP in a single combo, which is why most successful runs lean on landing that punish.
Reading the Attack Windups
The Hunter telegraphs every attack with a full body lean. The chain slash starts with her right shoulder dropping, which gives you roughly 0.4 seconds to start your dodge. The jump-over slash has a more obvious windup — she crouches slightly before launching — and is the easiest attack to bait because she always lands behind you, leaving her back open for 3-4 hits.
The ground stomp is the move that kills most first attempts. It creates a shockwave that deals damage on contact and applies a brief slow effect. Dodging toward her instead of away is counterintuitive but correct: the shockwave radius is wider behind you than in front, and dodging through the stomp puts you in melee range with a free punish window.
Damage Windows That Actually Close the Hunter Fight
Window 1: Chain Slash Recovery (3 hits)
The hunter fight has four real damage windows. Everything else is positioning. Once you internalize the timing of these windows, the fight becomes a clean two-cycle clear instead of a survival grind. After the three-hit chain slash, the Hunter recovers for roughly 0.8 seconds. This is enough time for three quick strikes with the matchstick or a short vessel melee combo. The window is short but it is also the most frequent punish opportunity in Phase 1, so optimizing it has the biggest impact on your time-to-kill.
Window 2: Stagger Punish (heavy + vessel)
The phase transition stagger is the highest-value window in the entire fight. You can land one fully charged heavy attack plus a thrown vessel before she recovers. The vessel throw during stagger is particularly effective because she stays grounded for the full animation, so the fire has time to tick for a second burn before she moves again.
Window 3: Net Recovery (2 hits + reposition)
The net toss in Phase 2 is the most dangerous attack because the net pins you in place for 1.2 seconds if it lands. The recovery, however, is longer than the pin — roughly 1.6 seconds — and leaves her stationary at mid-range. Two vessel throws plus a dodge away clears the net threat and lands a chunk of damage.
Window 4: Crow Summon Punish (free vessel throw)
When the Hunter summons crows, she stands still and channels for 2.5 seconds. This is the longest single window in Phase 2 and the only one where you can safely land a charged heavy strike without a dodge cancel. The crows themselves deal minor chip damage but are easy to avoid by staying on the ground layer.
| Window | Duration | Damage Potential | Risk Level |
|---|---|---|---|
| Chain slash recovery | ~0.8s | 3 quick hits | Low |
| Phase stagger | ~1.5s | Heavy + vessel | Medium |
| Net recovery | ~1.6s | 2 vessel throws | Low |
| Crow summon | ~2.5s | Charged heavy + 1 vessel | Very low |
The Queen: Final Boss Preparation and Loadout
The Queen is the final boss and the only fight that uses every traversal ability, every vessel type, and the full 32-slot trinket grid. She has three phases, and each phase has a different damage profile, which means the right trinket swap between phases often matters more than the loadout you walk in with. According to the official Steam store page, the game released September 22, 2026 with 41 achievements, and the Queen kill is the trophy tied to the "The End" achievement — so the build you bring into this fight directly gates 100% completion. Before entering the Queen's antechamber, verify you have the following:
Pre-Fight Checklist
-
32 trinket slots unlocked (required to fit both a damage set and a survivability set in the swap window)
-
Fire vessel + water vessel both upgraded to at least tier 2
-
Heavy strike unlocked from the Starsinger path
-
Glide upgraded for the Phase 3 aerial phase
-
At least 4 healing charges stocked at the spa before entry
Missing the heavy strike or the glide is the most common reason first attempts fall apart in Phase 3, because both are required to hit the Queen's aerial punish windows. If you have not yet reached the Starsinger or the Forest King, the boss arena guide covers the traversal prerequisites.
Phase 1: Ground Pressure and Vessel Trades
The Queen opens with the same tempo as the Hunter but with more HP and a wider attack pool. Her ground combo ends in a sweep that hits the full lower half of the arena, so jumping is not a safe response — the punish window is directly above her head during the recovery.
Vessel juggling is the most reliable damage source in Phase 1. Throwing a fire vessel and hitting it with a melee strike bounces it back into the Queen for a second tick of burn damage. The Accelerated Ideas boss showcase demonstrates the juggling loop on all late-game encounters, and the Queen specifically rewards it because her Phase 1 hitbox stays grounded for the full animation.
Phase 2: Adds and the Queen's Retreating Pattern
At roughly 60% HP, the Queen summons two bird adds and shifts to a retreating pattern. The adds have low HP but they apply a slow debuff on contact, which is what kills most runs in this phase. Clearing the adds first is the safe route, but the fast route is to ignore them and burst the Queen during her retreat animation, because she is vulnerable for roughly 2 seconds after every backstep.
The trinket swap that matters most here is the Crowd Cleared charm, which removes the slow debuff from add contact for 8 seconds. Combined with a heavy strike trinket, this swap turns Phase 2 from a survival check into a pure damage race.
Phase 3: Aerial Phase and the Glide Punish
Phase 3 begins at roughly 25% HP and shifts the entire fight to the air. The Queen gains a permanent hover and fires descending dive attacks that deal heavy damage on contact. The glide ability is the only reliable way to stay in range during this phase, because walking on the ground leaves you outside the punish window for most of her attack cycle.
The punish window in Phase 3 is short — roughly 0.6 seconds after each dive — but it is consistent. A glide cancel into a vessel throw lands in the window every time once you learn the timing. The phase lasts about 90 seconds if played cleanly, which is long enough that the Second Wind trinket (one free heal at 10% HP) is the difference between a clear and a one-shot loss.
| Phase | HP Threshold | Core Mechanic | Top Trinket Slot |
|---|---|---|---|
| Phase 1 | 100% → ~60% | Vessel juggling combo | Heavy Strike charm |
| Phase 2 | ~60% → ~25% | Add control + retreat punish | Crowd Cleared charm |
| Phase 3 | ~25% → 0 | Aerial dive punish windows | Second Wind charm |
Weapon Matchups and Boss Weakness Patterns
The matchstick is your default weapon, but the late-game charm system opens up swap options that meaningfully change your damage profile against specific bosses. According to community data from the Steam achievement stats page, the average first-attempt win rate against the Queen is under 15%, which climbs to over 60% once players start tailoring their trinket loadout to each phase.
Matchstick vs. Vessel Damage
The matchstick deals fast, consistent damage and is the best choice for short punish windows because it has the fastest recovery animation in the game. Vessels deal higher damage per hit but have a longer windup, which makes them risky in tight windows and devastating in long ones.
| Weapon | Damage per Hit | Windup | Best Window Length |
|---|---|---|---|
| Matchstick (tier 3) | 12 | 0.2s | 0.6s+ |
| Fire vessel (tier 2) | 28 + 6 burn | 0.5s | 1.2s+ |
| Water vessel (tier 2) | 22 + 3s wet DoT | 0.5s | 1.2s+ |
| Heavy strike (charged) | 45 | 0.8s | 1.5s+ |
The damage strategy that works for both the Hunter and the Queen is the same: matchstick for short recovery windows, vessel for staggers and summons, heavy strike for the phase transitions. The boss order and rewards breakdown covers which traversal abilities unlock after each kill, which determines which windows are even reachable on your first attempt.
Boss Weakness Quick Reference
Every boss in the game has a hidden elemental weakness that doubles the tick rate of the matching vessel burn. The Hunter is weak to fire, the Queen is weak to fire during Phase 1 and Phase 2 but neutral during Phase 3 (the aerial hitbox does not register elemental damage). The Forest King is the only boss weak to water, and the Starsinger is the only one weak to the thrown matchstick. The trinket encyclopedia approach is the most efficient way to build toward these swaps, because the 32-slot grid lets you carry a damage set, a survivability set, and a phase-swap set without losing access to your core charms.
| Boss | Weakness | Best Trinket Pair | Worst Mistake |
|---|---|---|---|
| Hunter | Fire | Heavy Strike + Burn Boost | Standing in the stomp shockwave |
| Queen (P1-P2) | Fire | Heavy Strike + Crowd Cleared | Ignoring Phase 2 adds |
| Queen (P3) | None | Second Wind + Quick Recovery | Fighting on the ground |
| Forest King | Water | Vessel Damage + Slow Resist | Meleeing during the vine spin |
| Starsinger | Thrown matchstick | Range Boost + Chain Cast | Dodging away during the rising star |
Late-Fight Recovery and Heal Windows
The spa healing system charges per rest, not per hit, so the right time to heal is during the longest enemy recovery window, not when you are low on HP. Both the Hunter and the Queen have at least one window per phase that is long enough to fit a full heal animation, and missing those windows is the single most common reason runs drag from 4 minutes to 12.
Hunter Heal Windows
The Hunter has two safe heal windows: the phase transition stagger (1.5s, enough for one heal) and the crow summon channel (2.5s, enough for two heals). Healing during the net recovery is a trap because the net itself can re-pins you if the heal animation cancels your i-frames.
Queen Heal Windows
The Queen has three safe heal windows. The Phase 1 stagger is the best, because it lasts 2.2s and the Queen is fully grounded. The Phase 2 retreat pattern has a brief idle between backsteps that is just long enough for one heal if you time it right. Phase 3 has no safe heal window — the Second Wind trinket exists specifically because of this, and it is the strongest defensive charm in the game for the final phase. The full healing economy is covered in the early-game farming and spa guide, which explains how to stock enough charges to enter the Queen's antechamber with 4-6 heals without grinding past the mid-game.
Closing the Run: What to Take Into the Next Playthrough
A clean Hunter clear followed by a clean Queen clear relies on the same three habits: reading the windup, holding the punish until the recovery, and swapping trinkets the moment the phase changes. The Hunter teaches the timing, and the Queen tests whether you actually learned it. Once both fights click, the rest of the late game opens up — the post-game rematch options, the Sharp and Shiny achievement chain, and the Full Flock ending all become achievable in a single clean run rather than a multi-attempt grind.
Frequently Asked Questions
What is the hardest boss in the Hunter to Queen sequence?
The Queen is the hardest fight in the sequence because she has three phases, each with a different tempo and a different optimal trinket loadout. The Hunter is a learning check, while the Queen is a gear check combined with an execution check. Most players who can clear the Hunter in under four minutes can clear the Queen with the right trinket swaps, but the Phase 3 aerial phase requires the glide ability and the Second Wind trinket to be done safely.
What is the best weapon for bosses in Well Dweller?
The matchstick is the best default weapon for short punish windows because it has the fastest recovery animation, but the fire vessel is the highest damage-per-window option against bosses weak to fire. The best approach is to carry both and swap based on the window length: matchstick for recoveries under one second, vessel for staggers and summons over 1.2 seconds. Heavy strikes are reserved for the phase transition staggers, which are the only windows long enough to fit the full windup.
How do boss weaknesses work in Well Dweller?
Every boss has a hidden elemental weakness that doubles the tick rate of the matching vessel burn, which means fire vessels against the Hunter and the Queen deal 100% more burn damage, water vessels against the Forest King deal 100% more, and thrown matchsticks against the Starsinger deal triple tick damage. The weakness is not listed in the boss room, so it has to be learned through play or by checking the boss fight showcase community data.
Can I rematch bosses after beating the Queen?
Yes, the post-game rematch system unlocks after the credits roll and lets you retry any boss with a higher difficulty modifier. Rematches drop upgraded trinkets that are not available in the first run, which is how most players fill the last 5-8 slots in the 32-slot trinket grid. The Sharp and Shiny achievement and the Full Flock chain both require rematch clears, so the post-game is not optional for 100% completion.
How long should the Hunter and Queen fights take?
A clean Hunter clear takes roughly 3-4 minutes, and a clean Queen clear takes 6-8 minutes. First attempts typically run 8-12 minutes on the Hunter and 15+ minutes on the Queen, but the time drops sharply once the punish windows become muscle memory. The key metric is not total time but the number of heals used — a clean run finishes with at least 2 heals remaining, which means the player took the safe windows and did not panic-heal during low-HP moments.