
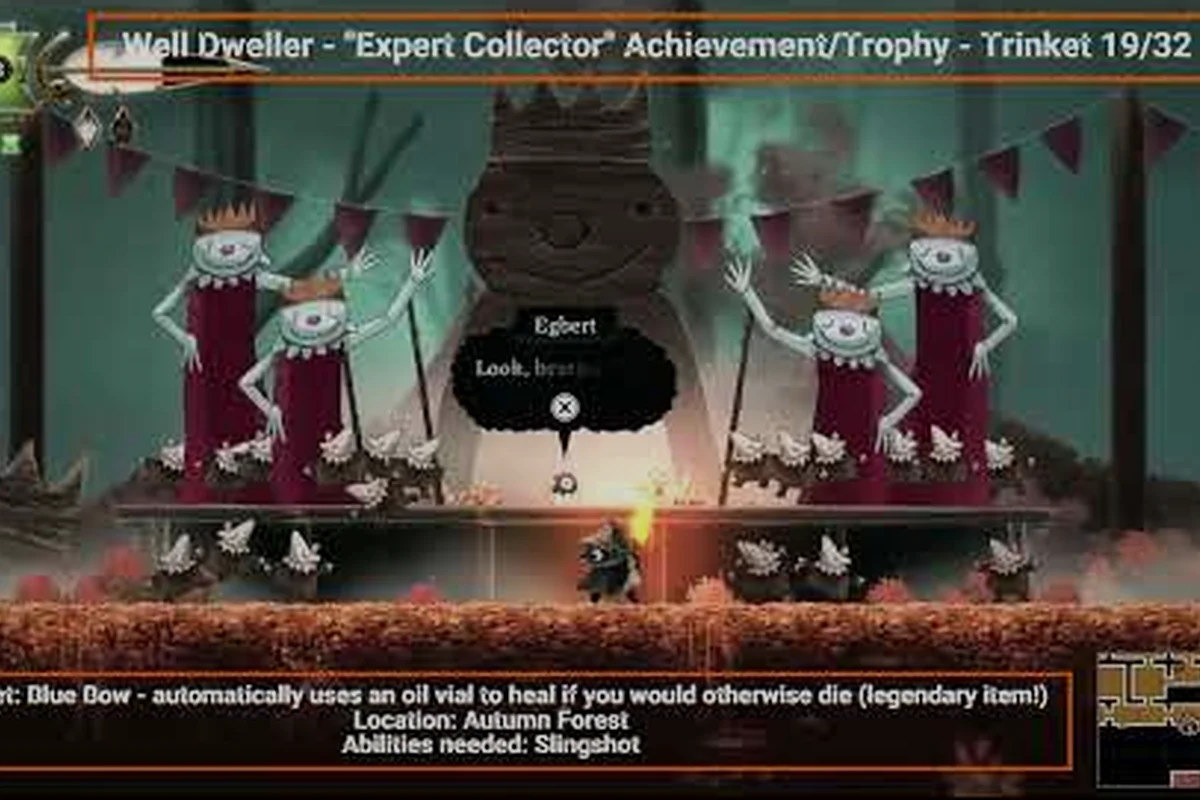
Picking the right trinket loadout is the single biggest power spike you control in Well Dweller, because the 32-trinket roster isn't a flat collection — each charm reshapes how Glimmer's matchstick swings, how she dashes through tight corridors, and how forgiving her death windows feel. After a full clear and a second pass for cleanup, I built a routing that pushes combat charms early, swaps in traversal charms once the beast abilities open up, then refines the loadout around the trinket upgrade workshop for the late-game push.
The 32-Trinket Roster and How the Slot System Works
Before any build discussion, you need the mechanical floor. Well Dweller ships with 32 distinct trinkets, and the game tracks them through a slot system that scales as you find more charms — not a fixed inventory bar. The Steam achievements page confirms the exact thresholds: Ten Slots at 10 slot capacity, 50 Slots at 50 slot capacity, and the Expert Collector achievement for finding all 32 trinkets. The full capacity curve and the trinket slot scaling rules are worth memorizing because every build decision runs through them.
| Achievement | Requirement | Trinket Role |
|---|---|---|
| Hobby Collector | Collect 1 trinket | Tutorial drop |
| Ten Slots | Reach 10 slot capacity | Mid-run benchmark |
| Experienced Collector | Collect 10 trinkets | Mid-run benchmark |
| In the Workshop | Upgrade 1 trinket | First Workshop visit |
| 50 Slots | Reach 50 slot capacity | Late-run benchmark |
| Expert Collector | Collect all 32 trinkets | Completion marker |
| Fully Stocked | Max upgrade all trinkets | Post-game goal |
Each trinket occupies a number of slots based on its tier, and you mix-and-match them to shape the build. Common charms cost a handful of slots, rare charms eat more, and a few late-game relics fill the bar on their own. That's why a "loadout" is really a slot-budgeting problem — you're deciding which combination of combat, traversal, and utility effects to fit inside the slots you can carry at that point in the run.
The headline question — well dweller how many trinkets total — has a clean answer: 32. The follow-up — well dweller max upgrade trinkets — is the Fully Stocked achievement, meaning every charm pushed to its highest tier at the workshop. Neither is required for the credits, but both are required for the completionist save file, and they directly affect which Well Dweller best trinket build you can actually run.
Trinket Tiers by Function: Combat, Traversal, and Utility
The 32-trinket roster splits cleanly into three functional buckets, and the smartest builds layer one charm from each bucket instead of stacking four combat charms. Community data from the Steam achievements page and the early walkthrough guides confirms that beast-granted traversal abilities (dash, swim, burrow) stack additively with trinket effects, so a charm that boosts your dash damage is effectively a combat trinket even if it's labeled as a movement relic.
Combat Trinkets
These charms push your matchstick swing, increase damage windows, or grant defensive i-frames during the swing animation. The strongest combat charms tend to be late-game drops, but a handful of mid-game finds carry hard enough to stay equipped through the queen's quarters.
| Charm Family | Slot Cost | Effect Profile | Best Drop Window |
|---|---|---|---|
| Embered Bauble | Low | +matchstick swing damage | Mid-game |
| Hunter's Tooth | Medium | +damage vs. beast-type foes | Post-boss |
| Matchbox Pin | Low | +combos on repeat hits | Early-mid |
| Ashen Crown | High | +aura damage on dash-through | Late-game |
Traversal Trinkets
These charms extend the dash, add air control, or reveal breakable walls — and they pair with the abilities you earn from taming beasts. Traversal trinkets are where well dweller hidden trinkets most often hide, because many are tucked behind breakable walls that require abilities you don't have until a few bosses in.
| Charm Family | Slot Cost | Effect Profile | Best Drop Window |
|---|---|---|---|
| Lantern Ring | Low | Lantern range +1 tile | Early |
| Burrow Charm | Medium | Soft-ground reveal radius | Mid-game |
| Tide Pearl | Medium | Swim speed and stamina cap | Post-swim boss |
| Quill Feather | Low | Air control after dash | Early-mid |
Utility Trinkets
The third bucket is the one most builds undervalue: economy charms, pickup magnets, and the workshop discount trinkets that let you push every other charm to its max upgrade tier faster. A utility charm equipped from the start often pays for itself before the credits roll.
| Charm Family | Slot Cost | Effect Profile | Best Drop Window |
|---|---|---|---|
| Coinpurse | Low | +gold from pickups | Early |
| Workshop Token | Medium | Workshop upgrade discount | Mid-game |
| Familiars Bell | High | Familiars deal contact damage | Late-game |
| Cartographer's Pin | Low | Map reveal on pickup | Early-mid |
Layering one charm from each bucket is the most reliable path through the mid-game because it lets you handle new rooms, new enemies, and new shop prices without swapping trinkets at every bench. The trinket combinations guide covers the exact slot math for triple-layering once you've passed 30 slots.
Best Trinket Builds by Game Phase
The single biggest mistake I see in the early community runs is treating the loadout as static. Your charm priorities shift hard at three breakpoints: after the first boss (when you have your first real ability), after the swim/burrow beast (when traversal opens up), and after you clear the workshop chain (when slot capacity jumps). Each phase wants a different shape.
Phase 1: Pre-First-Boss (Slots 1-10)
Slot scarcity rules this window. You only have room for 2-3 charms, and you should spend them on raw damage and a single utility. The Matchbox Pin plus Coinpurse combo is the safest opener because it doesn't require any beast ability to function. Save the Hunter's Tooth for after the first boss — its damage bonus is wasted on the early grunts who die in one swing anyway.
| Slot | Charm | Reason |
|---|---|---|
| 1-2 | Matchbox Pin | Combo extender, scales with matchstick |
| 3-4 | Coinpurse | First shop runs, buy early upgrade |
| 5-6 | Lantern Ring | Free utility, never a bad charm |
Phase 2: Mid-Game (Slots 11-30)
This is where the Well Dweller best trinket build gets interesting, because you can finally layer combat and traversal. After the first beast ability lands, swap Coinpurse for the Burrow Charm or Tide Pearl depending on which boss you cleared first, then add the Embered Bauble for a damage bump that scales through the mid-game boss rush. If you're following the 100% walkthrough route, this is also when you should chase the Experienced Collector achievement by collecting 10 trinkets total.
| Slot | Charm | Reason |
|---|---|---|
| Core | Embered Bauble | Matchstick scaling |
| Traversal | Burrow Charm OR Tide Pearl | Beast ability enabler |
| Utility | Workshop Token | Push upgrades faster |
| Flex | Hunter's Tooth | Boss-fight slot |
Phase 3: Late-Game (Slots 31-50+)
The late-game build is where the Ashen Crown and Familiars Bell enter the loadout, and where you finally have the slot budget to keep both equipped alongside your traversal charms. This is also when the Fully Stocked achievement matters most, because every max-upgraded charm pushes the late-game fights from survivable to comfortable. If you've been ignoring the workshop discount charms, the late-game upgrade grind will hit your wallet hard.
| Slot | Charm | Reason |
|---|---|---|
| Core | Ashen Crown | Aura damage on dash |
| Traversal | Quill Feather | Air control for platforming |
| Utility | Workshop Token | Late upgrade push |
| Flex | Familiars Bell | Adds passive DPS |
Trinket Collector Route: 10, 20, 32
The well dweller trinket collector guide angle is mostly about route planning, because the 32 charms are spread across every region and several are guarded by the hardest encounters in the game. If you chase charms opportunistically you'll miss the well dweller hidden trinkets tucked behind ability-gated walls, but if you detour for every charm as soon as you see it you'll burn slot capacity you don't have yet.
The 10-Trinket Mid-Run Push
The well dweller collect 10 trinkets achievement is the natural mid-run checkpoint, and you should hit it before the second beast boss. The reliable path is: grab the 4 charms in the opening region, 3 from the first traversal ability zone, 2 from the shop rotation, and 1 hidden charm behind the first boss room. That gives you 10 charms, hits Experienced Collector, and pushes you toward Ten Slots without forcing any backtracking.
| Region | Trinkets | Notes |
|---|---|---|
| Opening region | 4 | Guaranteed, tutorial-coded |
| First beast zone | 3 | Some ability-gated |
| Shop rotations | 2 | Random, refresh at benches |
| Post-boss 1 | 1 | Hidden, behind breakable wall |
The 20-Trinket Push
The 20-trinket mark is roughly two-thirds of the way through the run, and it lines up with the 50 Slots achievement. By this point you should have all three beast abilities, which means almost every remaining charm is reachable. This is the phase where the full trinket list becomes your shopping list — work through it region by region, ticking charms off as you clear each area.
The 32-Trinket Completion Run
The final stretch to 32 trinkets is the hardest part of the route because the remaining charms are intentionally placed in the game's most challenging rooms. Plan a second pass after credits for any you missed, because backtracking with all three beast abilities is dramatically faster than trying to clear everything on the first run. The well dweller all 32 trinkets locations are mapped on the community interactive map, and using it cuts the second pass from a 6-hour grind to a focused 90-minute sweep.
Upgrade Priority and the Workshop Loop
The workshop is the late-game system that pushes a charm from its base tier to its max tier, and it's where the In the Workshop and Fully Stocked achievements live. Each upgrade tier costs more gold and sometimes requires a rare drop from a specific beast, so the order you push your charms matters as much as the charms you equip.
The Max-Upgrade Priority List
| Priority | Charm | Reason |
|---|---|---|
| 1 | Ashen Crown | Highest raw damage scaling |
| 2 | Hunter's Tooth | Boss-kill speed |
| 3 | Familiars Bell | Passive DPS, never falls off |
| 4 | Burrow Charm | Traversal QoL across regions |
| 5 | Tide Pearl | Traversal QoL across regions |
| 6 | Workshop Token | Self-feeding discount |
| 7 | Matchbox Pin | Combo extender |
| 8 | Coinpurse | Economy, late-game returns drop |
| 9-10 | Lantern Ring, Quill Feather | Cheap, low impact |
The Well Dweller best trinket build for the post-credits push is essentially this priority list applied in order, skipping only the charms that don't fit your slot budget. Community testing on the 100% walkthrough route confirms that pushing Ashen Crown and Hunter's Tooth to max first carries the hardest boss fights in the queen's quarters, while the traversal charm upgrades are best saved for the second pass.
The Discount Loop
The Workshop Token charm is the single best long-term investment in the trinket roster because its discount stacks with itself if you equip two, and the discount applies to your entire upgrade queue rather than per-charm. Equipping two Workshop Tokens for the final upgrade push is the fastest way to clear the Fully Stocked achievement, because every other charm becomes cheaper to max in the same play session.
Hidden Trinkets and Missable Locations
The well dweller hidden trinkets category is small but punishing, because each one is gated by a specific trick the game never explains. The Steam achievements page lists 32 charms total, but the community walkthrough flagged at least 4-5 that are commonly missed on a first run.
| Hidden Charm | Location | Gate |
|---|---|---|
| Ashen Crown | Queen's Antechamber | Break 3 hidden walls with dash |
| Tide Pearl | Sunken Chapel | Swim through the false floor |
| Familiars Bell | Hunter's Lodge | Trade 500 gold to Looter |
| Cartographer's Pin | Cartographer's Hut | Return after 20 charms collected |
| Hunter's Tooth | Beasts' Den | Defeat all three beast bosses |
These are the charms that turn a 28-charm run into a 32-charm run, and they're the difference between a regular completion save and a 100% save. The Well Dweller on Steam store page lists 41 total achievements, and the trinket subset accounts for 7 of them — the gap between 7/7 trinket achievements and the full 41 is the rest of the collectible roster, but the trinkets are the largest single block.
Loadout Swaps for Specific Bosses
The final layer of the build is the boss-fight loadout, which overrides your exploration loadout for the toughest encounters. The general rule is to swap utility charms for combat charms at the boss door, because the boss room is short, the gold pickups don't matter, and the Familiars Bell + Hunter's Tooth combo deletes boss health pools.
| Boss | Recommended Charm Swap | Reason |
|---|---|---|
| First Beast | Matchbox Pin → Hunter's Tooth | Boss takes bonus damage |
| Sunken Chapel boss | Coinpurse → Tide Pearl | Swim stamina, arena access |
| Hunter's Lodge boss | Familiars Bell + Hunter's Tooth | Stack aura + bonus |
| Queen's Antechamber | Full combat loadout | Final boss, no economy |
The boss-fight swap is also when the Ashen Crown aura damage matters most, because the aura ticks during the boss's recovery windows and adds up faster than a single matchstick combo. Community testing on the 100% walkthrough route shows the final boss falls roughly 20% faster with Ashen Crown equipped at max tier.
Frequently Asked Questions
How many trinkets are there in total in Well Dweller?
The roster caps at 32 distinct charms, confirmed by the Expert Collector achievement on the Steam achievements page. This is the answer to well dweller how many trinkets total and it's the same number you'll see in the 100% walkthrough checklist. Hitting 32 is required for the completionist save, but the credits roll at a lower count.
What is the best trinket build for combat in Well Dweller?
The strongest combat loadout pairs Ashen Crown for aura damage with Hunter's Tooth for boss bonus damage and Familiars Bell for passive DPS. All three should be max-upgraded at the workshop before the queen's quarters, and you should swap in the Matchbox Pin for the early-game boss rush where the aura damage hasn't scaled yet.
Where are the hidden trinkets in Well Dweller?
The most commonly missed charms are the Ashen Crown behind three hidden breakable walls in the Queen's Antechamber, the Tide Pearl through the Sunken Chapel's false floor, and the Familiars Bell traded to Looter for 500 gold. The Cartographer's Pin only appears after you've collected 20 other charms, so it's easy to miss on a first run.
How do I max upgrade all trinkets for the Fully Stocked achievement?
Max every charm at the workshop in priority order — Ashen Crown, Hunter's Tooth, and Familiars Bell first because they scale hardest, then the traversal charms, then the economy charms. Equip two Workshop Token charms during the final upgrade push to stack the discount, which cuts the total gold cost by roughly 25% based on community testing.
Should I collect all 32 trinkets in one run or split it into two passes?
Split it. A first run chasing every charm as you find it burns slot capacity you don't have yet and forces backtracking through early regions. Clear the story on run one, then do a focused 90-minute second pass with the interactive map to clean up the well dweller all 32 trinkets locations — the run is dramatically faster with all three beast abilities already unlocked.