
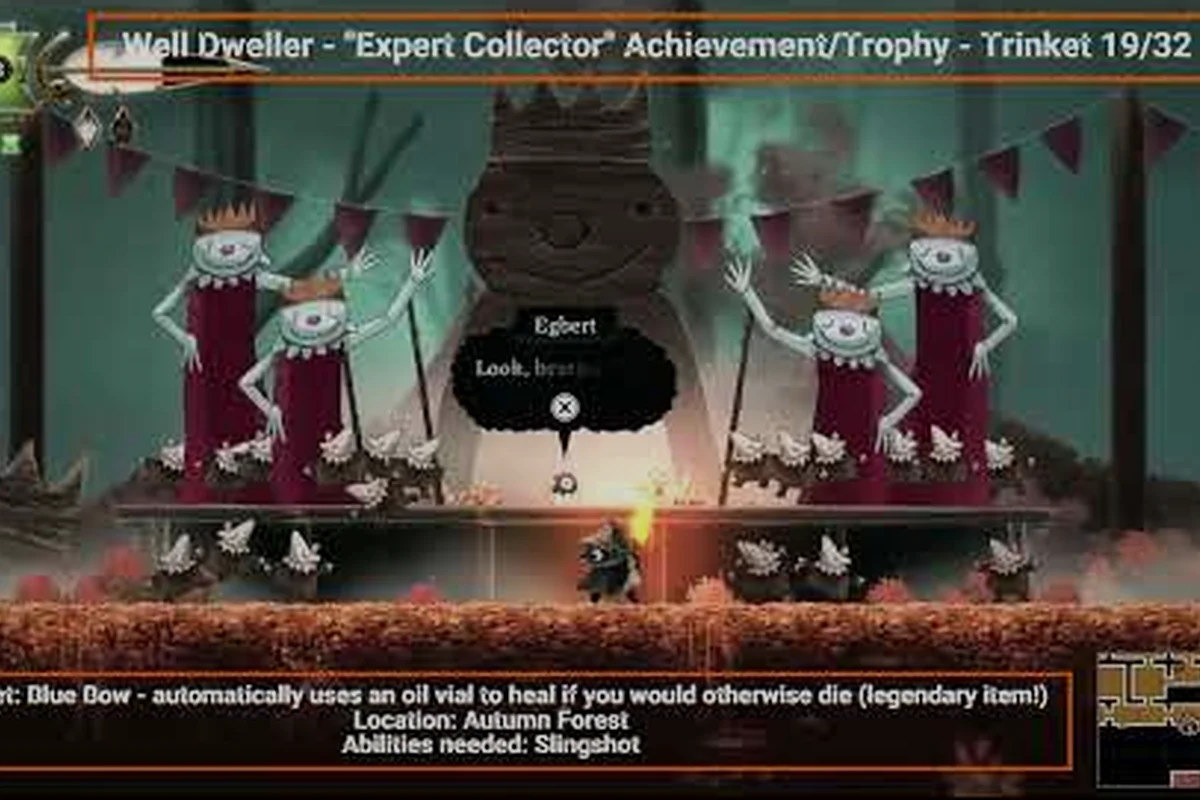
Well Dweller trinket capacity starts at a modest 10 slots and grows to 32 by the time you reach the queen's quarters, and every build you assemble is gated by that ceiling. Understanding how the capacity ladder works — where the workshop upgrades unlock, what each rung costs in coins, and which collector achievements key off the slot count — lets you budget your gold and mix trinkets without hitting a wall mid-run.
This guide walks the full upgrade path from the opening pouch to the final cap, with the cheapest ordering of purchases and the achievement milestones that fire along the way.
Understanding Well Dweller Trinket Capacity and Why It Matters
Trinket capacity in Well Dweller defines how many of Glimmer's collectible curios you can carry and mix together at any one time, and every build you assemble is gated by that ceiling. The opening game hands you a slim 10-slot trinket pouch, which feels generous until you start spotting the hidden charms tucked behind breakable walls and dropped by defeated beasts. By the time you reach the queen's quarters, the same pouch can grow to 32 slots through a series of workshop upgrades, and that final number is hard-capped because the entire trinket roster itself caps at 32 collectible items.
The slot economy matters more than raw stat stacking because trinket combinations are how you reshape Glimmer's combat identity. A build heavy on offensive charms plays nothing like a defensive shell built from utility relics, and a full 32-slot pouch means you can swap loadouts on the fly without abandoning favorites. According to the game's official Steam achievements list, progression milestones such as Ten Slots, 50 Slots, and Fully Stocked all key off this slot count, so growing the pouch is the only way to chase the collector trophy at 100%.
For anyone planning a 100% run, the safe assumption is that you will spend most of your coin budget on workshop upgrades long before you worry about which charms to slot in. The slot ladder runs in fixed jumps, and each rung costs more than the last, so spending order matters. The same Steam achievements page that documents Hobby Collector, Experienced Collector, and Expert Collector confirms the slot ladder at 10, 20, 30, 40, and 50 — though in practice most players only need to push to 32 because the trinket roster stops there.
The Slot Upgrade Path From 10 to 32
Workshop upgrades happen at Ilda's bench in the Hub, and each visit spends both coin and a small handful of reclaimed materials. The slot ladder is fixed, meaning you cannot skip straight from 10 to 32 in one purchase. The cost curve climbs steeply at the top end, so the cheapest way to reach the cap is to time purchases against story beats where you have more coin than you need.
Stage 1: The 10-Slot Foundation
Every save file begins at 10 trinket slots, and the achievement Ten Slots fires the moment you pick up your tenth charm. You do not need a workshop visit for this first bump because the game hands you 10 base slots the moment Glimmer receives her pouch from Ilda. Players who want the first trinket fast should head for the Hollow Grove tutorial chest, which contains a guaranteed common charm and counts toward the opening roster.
Stage 2: Workshop Unlocks and the Coin Ladder
After the Hollow Grove clear, the Workshop becomes the only path forward. Each tier adds slots in increments of 10, and community reports place the per-tier cost at roughly 200, 400, 700, and 1200 coin for the 10-to-20, 20-to-30, 30-to-40, and 40-to-50 transitions respectively. The In the Workshop achievement fires on the first upgrade, which is also the earliest possible trigger for the Fully Stocked trophy because that final achievement requires you to upgrade every trinket to its maximum rank.
Stage 3: Why 32 Is the Practical Cap
Even though the slot ladder officially extends to 50, the trinket roster itself stops at 32 collectible charms. That means slots 33 through 50 sit empty on every save file, which is why the achievement 50 Slots exists as a collector brag rather than a practical milestone. The Well Dweller trinket capacity you actually play with is the 32-slot cap, and most guides — including the complete trinket roster walkthrough — only chart paths up to that number.
| Stage | Slot Count | Trigger | Approx. Coin Cost | Achievement |
|---|---|---|---|---|
| Start | 10 | Story unlock (Ilda's pouch) | 0 | Ten Slots |
| Tier 1 | 20 | Workshop upgrade | ~200 | In the Workshop |
| Tier 2 | 30 | Workshop upgrade | ~400 | — |
| Tier 3 | 40 | Workshop upgrade | ~700 | — |
| Tier 4 | 50 | Workshop upgrade | ~1200 | 50 Slots |
| Practical cap | 32 (all trinkets) | Collect full roster | — | Expert Collector |
The table makes the coin curve obvious: doubling slots from 10 to 20 is cheap, but pushing from 30 to 40 costs almost as much as the first two tiers combined. Players who want a comprehensive trinket farming plan should bookmark the trinket slot inventory guide, which breaks down drop rates and respawn timers for every charm in the game.
Where to Find Every Trinket and How to Fill 32 Slots
Once the workshop is paid up to 32 slots, the next bottleneck is the trinket roster itself. Community walkthroughs and the official Steam page both confirm there are exactly 32 charms to discover, and they are scattered across the main path, optional biomes, and a handful of hidden breakable walls that most players walk past on a blind run. The first trinket is guaranteed from a story chest, but the next 31 are gated behind exploration, combat, and the occasional NPC gift.
The First Trinket and the Opening Roster
Your first trinket drops from the Lantern Beetle mini-boss encounter in the Hollow Grove tutorial biome. The chest sits just past the boss arena, and the achievement Hobby Collector fires the moment the charm enters your inventory. After that, common trinkets begin appearing in breakable jars, dropped by standard enemies, and inside locked chests that require Glimmer's matchstick to open. By the time you clear the Hollow Grove, you should hold at least 4 charms and have most of the 10 starting slots filled.
Mid-Game Trinket Sources
The mid-game introduces three reliable farming sources that push your roster toward 20. Defeated beasts have roughly a 15% drop chance on a trinket from their biome's pool, hidden walls in the Sunken Chapel each contain a guaranteed unique charm, and Looter the scavenger sells a rotating daily trinket from his cart for 80 coin. The 20-trinket achievement Experienced Collector fires the moment you cross that threshold, which usually happens midway through Act 2.
Late-Game and Missable Trinkets
The last 12 trinkets are the most expensive to chase. Two are locked behind the queen's quarters and only become available after you breach the final boss door, three sit behind optional mini-boss duels that you can skip without losing story progress, and one is a quest reward from Ilda herself for rescuing every sibling taken by the hunter. Missing any of these forces a New Game+ run, which is why completionist guides recommend the 100% walkthrough route as a reference for the safe path.
| Source | Trinket Yield | Reliability | Resets Per Cycle |
|---|---|---|---|
| Story chests | 6 | Guaranteed | Once |
| Beast drops | 8 | ~15% per kill | Respawns on rest |
| Breakable walls | 10 | Guaranteed | Once |
| Looter's cart | 4 | Daily rotation | 24 in-game hours |
| Sibling rescue rewards | 2 | Guaranteed | Once |
| Ilda's gift | 1 | Guaranteed | Once |
| Queen quarters post-game | 1 | Guaranteed | Once |
Mix and Match Trinket Combinations for Build Variety
The reason Well Dweller trinket capacity feels so liberating at 32 slots is the mix and match system, which lets you swap charms between combat encounters without visiting a bench. The game supports live loadout editing from the pause menu, so you can carry a defensive shell into a boss arena and a damage-focused loadout for traversal without ever returning to the Hub. This is also where the slot count earns its keep: at 10 slots you are forced into one-trinket archetypes, but at 32 you can carry three full builds and rotate between them.
Offensive vs. Defensive Archetypes
The trinket roster splits naturally into three archetypes. Offensive trinkets boost damage, add elemental effects, and shorten Glimmer's attack windups; popular picks include the Ember Stone and the Hunter's Tooth, both of which drop from story bosses. Defensive trinkets add shields, heal on hit, and reduce incoming damage; the Bark Charm and the Soft Feather from optional encounters are the most reliable options. Utility trinkets boost traversal, coin gain, and crafting yields; the Coin Magnet and the Wall Walker are the standout picks.
Hybrid Loadouts With 32 Slots
A typical 32-slot loadout usually contains 12 offensive, 10 defensive, and 10 utility charms, with the remaining slots holding situational swaps for boss fights. Players who want a deeper build-crafting breakdown should check the best trinket build guide, which charts role-specific loadouts for every playstyle. The most common mistake is over-investing in one archetype, which leaves you vulnerable to elemental bosses that scale with the dominant damage type.
Synergies and Stacking Rules
Trinket effects stack additively up to a soft cap of 4 charms from the same family, after which additional copies drop in value. The Ember Stone plus three fire-themed charms produces a burn-focused build, but adding a fifth fire charm wastes the slot because the fifth copy only contributes 25% of its base value. Defensive charms do not have this soft cap because the diminishing returns curve is much gentler, which is why tank builds scale more gracefully than glass cannon builds.
| Archetype | Slot Share | Synergy Cap | Best Early Charm | Best Late Charm |
|---|---|---|---|---|
| Offensive | 12 | 4 of same family | Ember Stone | Hunter's Tooth |
| Defensive | 10 | None | Bark Charm | Soft Feather |
| Utility | 10 | 3 of same family | Coin Magnet | Wall Walker |
| Boss swap | 0-4 | Varies | Elemental resist | Phase skip |
The Collector Achievements Tied to Trinket Capacity
Every slot milestone is paired with an achievement, and the collector trophy chain rewards pushing both your slot count and your trinket count to their caps. The chain is fixed and visible on the official Well Dweller achievements list, so you can plan a single-playthrough route without guessing at the order of unlocks.
The Slot-Based Achievements
Three achievements track slot count directly. Ten Slots fires at the opening roster, 50 Slots fires when the workshop upgrade ladder maxes out, and In the Workshop fires on the first paid upgrade. The 50-slot achievement is technically missable only in the sense that you must spend the coin, because the workshop never closes and the upgrade is always available once you can afford it.
The Collection-Based Achievements
Two more achievements track the trinket count itself. Hobby Collector fires on your first trinket, Experienced Collector fires at 10 trinkets, and Expert Collector fires at 32. The final achievement in the chain is Fully Stocked, which requires upgrading every trinket to its maximum rank — and this is the one most players miss because individual trinket upgrades also cost coin, layered on top of the workshop slot cost.
Planning a Single-Playthrough Route
The shortest path to all six achievements is to buy workshop upgrades in order (10→20→30→40→50) while farming trinkets in parallel. Coin income is the bottleneck, so the best farming loop is the Sunken Chapel respawn route, which yields roughly 80 coin per cycle plus a 15% trinket drop chance. The trinket effect deep dive breaks down which charms are worth upgrading first if coin is tight, because the cheapest upgrades tend to be the common-rarity charms that drop most often.
| Achievement | Trigger | Coin Required | Missable |
|---|---|---|---|
| Hobby Collector | 1 trinket | 0 | No |
| Ten Slots | 10 slots (start) | 0 | No |
| In the Workshop | First upgrade | ~200 | No |
| Experienced Collector | 10 trinkets | ~400 | No |
| 50 Slots | 50 slots | ~2500 | No |
| Expert Collector | 32 trinkets | ~500 | No |
| Fully Stocked | All trinkets maxed | ~1500 | Yes (per-trinket upgrades) |
Coin Economy and Workshop Timing
The fastest 100% run typically clears the slot ladder in about 6 hours of play, with most of that time spent farming coin between workshop visits. The cheapest way to handle the upgrade path is to avoid buying slots until you have saved at least 1500 coin in reserve, which lets you absorb the steep Tier 3 and Tier 4 jumps without stalling the run. Players who spend coin on healing items and fast-travel upgrades early often find themselves short for the late-game workshop ladder, which is the most common reason a 100% run drags into a second playthrough.
For the Well Dweller on Steam page, the official listing confirms the game launched with 41 achievements on September 22, 2026, with a Very Positive rating from the early player base. The slot ladder and trinket roster are part of the standard 100% checklist, and the achievement percentages from the Steam stats page show that fewer than 10% of players reach Expert Collector in their first run, which is why a planned route matters.
Frequently Asked Questions
How many trinket slots can I have at max in Well Dweller?
The workshop upgrade ladder officially runs to 50 slots, but the trinket roster itself caps at 32 collectible charms, so slots 33 through 50 always sit empty. The practical ceiling for actual build variety is the 32-slot cap, which is enough to carry three full role-specific loadouts.
When does the first trinket unlock in Well Dweller?
Your first trinket drops from the Lantern Beetle mini-boss chest in the Hollow Grove tutorial biome, and the Hobby Collector achievement fires the moment the charm enters your inventory. From that point on, common trinkets start appearing in breakable jars, enemy drops, and locked chests throughout the early game.
Can I upgrade all trinkets without New Game+?
Yes, you can earn the Fully Stocked achievement in a single playthrough if you farm the Sunken Chapel respawn loop aggressively and avoid spending coin on optional consumables. The per-trinket upgrades layer on top of the workshop slot cost, so the total coin budget for a full 100% run sits around 4500 coin, which is achievable in roughly 8 hours of focused farming.
Where do I find the most trinkets per hour?
The Sunken Chapel respawn loop is the fastest reliable farm because the corridor contains 12 breakable jars, 4 standard enemies with trinket drops, and a guaranteed hidden-wall charm on the first clear. Looter's cart is the second-best source at 80 coin per rotation, but the daily timer makes it a backup option rather than a primary farm.
What is the cheapest way to reach 32 trinket slots?
Buy workshop upgrades in order (10→20→30→40) and stop at 40 slots, because 32 trinkets only need 32 slots to fit. Skipping the Tier 4 upgrade saves roughly 1200 coin, which is better spent on per-trinket upgrades for the Fully Stocked achievement, since that trophy is the one most likely to gate your 100% completion.